I’ve been teaching from my office since March of 2020. It’s a challenge, but well worth it to be able to offer educational enrichment services to my students and to address questions as they may arise with my patterns. Want to know how I do it? There are three components to keep in mind – lighting, camera, and sound. To save you some time and energy, here’s a guide which I wish I had been given when I began my online teaching journey.
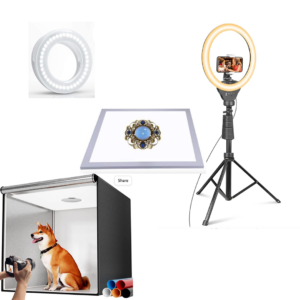
Lights: You need them. If you are on a budget, two ring lights work. They do tend to create odd halos which can be exceptionally distracting to others on the call if they happen to reflect against your glasses or another glossy surface in the camera’s view.
I use these. I chose them because they have tripods included, are lightweight and are easy to store. While I do like to shop local, I am providing links to the items I use available on Amazon because not everyone has the convenience of walking into town, getting on the train and shopping at the same shops I love.
For travel I also keep a small ring light in my tote bag. It’s compact and easy to use when I want to take a quick photo with my iPhone.
Pro tip: Make sure if you take your lights with you that you protect them from scratches and breakage when traveling. The ring light I keep in my purse is kept in a small microfiber bag with a draw string top to protect it from the hazards of life in my bag.
To remove shadows when I shoot still photos or teach techniques where my hands need to be easily seen I use a light panel either on my work table or in my light box.
A light box helps too when you want to get crisp photos with either no collateral background interference or when you want to highlight something specific in your photo.
Pro tip: get the biggest one you can afford because as your portfolio grows, you will want to be able to take photos of more items, perhaps even shoot your how to videos in the light box.
https://amzn.to/3ShjYoP or for a version that is portable, https://amzn.to/3BOHiTS
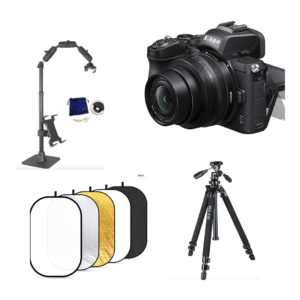
Camera: Depending upon the type of work you are doing, you may want to use something more sophisticated than your trusty iPhone or other smart phone. Personally I opted for a digital mirrorless SLR camera because it’s light weight, can be used as a video conferencing camera and offers me the flexibility of using it to take photos of my designs at a higher level of resolution and quality than my smart phone.
To keep my phone in place when I am using it as a video camera, I prefer a table top stand with a secondary device holder to keep my iPad close at hand. When using the Nikon camera I opt for my trusty old tripod which is no longer available but very similar to the one below. Looks like the device holder is currently packaged with a small light ring so if you do opt for it, no need to buy a separate portable ring light.
Reflectors are helpful to eliminate shadows particularly under the eyes of a model or to filter the light on a very sunny day. There’s no need to go overboard on these reflectors, they come in easy to assemble sets which feature multiple different filters; gold, black, white, and silver. I prefer these to other reflectors and filters because they are easy to store and toss in the trunk when I want to take them with me.
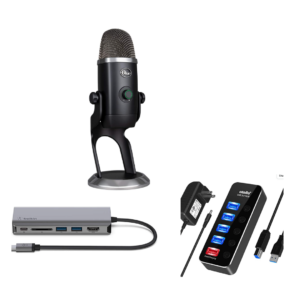
Sound: Those of you who know me know I do not speak loudly, never have unless under duress or dealing with a particularly ignorant party so rather than rely upon the microphone in my laptop I prefer to use an external microphone which I position between my Zoom video camera and my work table camera so as I move between them my voice can be heard. The one I bought is the Yeti Blue. I purchased it because it is compact and has two different listening modes which is helpful in a household with four rabbits, a dog, and spouse who also works at home.
Pro tip: Buy yourself a powered USB hub so you can plug in all of your devices in one place. There are a lot on the market, I like blue so I bought one with blue lights in it to denote which ports are powered on. Since a lot of the cables are black, I used old nail polish to mark each plug with the appropriate letter to denote its function; L – light, Y – Yeti Mic, M – Mouse, B- Backup. My Mac requires a USBc adapter to use the hub, so check your computer before you purchase your hub to make sure you can connect them. The exact models I bought are no longer available, here are the newer versions:
https://amzn.to/3ff4pzn for the powered hub and https://amzn.to/3CdJK85 to connect it to my Mac
Software: For Zoom the best plan is the Pro plan for a small business. It eliminates the pesky 40 minute limit of the free plan and allows for easy access to your video content for later use whether you elect to save your work to your local machine or their cloud. It can be hooked into Facebook Live if your audience is on that platform.
I hope these suggestions help you on your on-line teaching journey.
Depending on which items you may buy from these links, I might receive a small commission from Amazon, it won’t impact your price, just their profit margin from which which they pay commissions on select purchases.
Keep the questions coming, there’s enough room for all of us to share our on line teaching experiences.
Comments are closed